Note: this text was mostly translated automatically from the original post in Portuguese 2 years ago.
In this post I will show you how to make a KVM-switch for Linux using only software and some compatible hardware. I am using Fedora as my Linux distribution, but I believe the steps would be similar for Ubuntu, Arch and other modern distributions.
To get started you need the following devices:
- A monitor compatible with the DDC/CI standard (in my case, LG27UD59 )
- A Logitech MX Keys keyboard (for other devices, see comments at the end)
- A Logitech MX Master 3 mouse (for other devices, see comments at the end)
And the following installed software: ddcutil and Solaar . Installing them on Fedora is quite simple, as they are in the project’s official repositories:
sudo dnf install -y solaar ddcutil
mouse and keyboard
Chances are you already have Solaar installed if you have the Logitech keyboard and mouse. Either way, the project documentation provides the initial steps for configuring Solaar, if necessary.
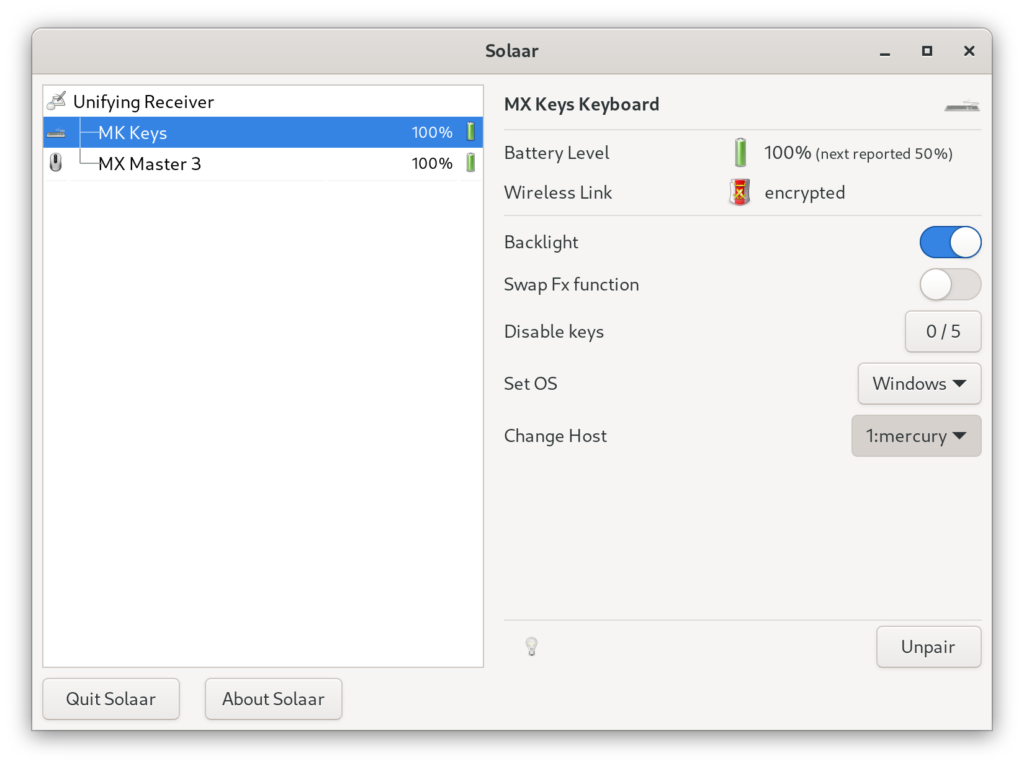
You can inspect the configuration of devices using the solar show command. Personally, I find it simpler to check the Solaar GUI, as it also shows what acceptable values are for the command we will use later. The information relevant to us is shown under “Change Host”. It shows the names of hosts your device is paired with.

Using the information shown in the UI, we can use the command line to change the active host:
solaar config "MX Keys" change-host 1:mercury
Note that the hostname has to be the same as shown in the UI and in some cases it may be that only the ID number is shown.
Repeat the same for the mouse, taking care to ensure that the ID used is the device ID, as it is possible that they are different between the mouse and the keyboard (e.g. keyboard host 1 is mouse host 2). , etc):
solaar config "MX Master 3" change-host 1:mercury
Monitor
To control the monitor, we use the ddcutil program, which serves to interact with the monitor’s software through the DDC-CI protocol suite. In this link here , which served as a reference to implement the monitor control, you can find some cool tips about ddcutil.
The first step is to detect the monitor and see what features are available:
sudo ddcutil detect
On some distributions it may be necessary to load the i2c-dev module. Fedora already does this by default, so no further steps are needed. If you are using another distro, consult the documentation.
If executed successfully, the command will show output similar to this one:
Display 1
I2C bus: /dev/i2c-2
EDID synopsis:
Mfg id: GSM
Model: LG Ultra HD
Serial number:
Manufacture year: 2017
EDID version: 1.3
VCP version: 2.1
If you’re using a laptop, the command will also show the built-in monitor information. This built-in monitor is not relevant for the virtual KVM-switch , so we can ignore the error messages referring to it.
The relevant information shown by the above command is the I2C bus . More specifically, the bus number (2, in the case of /dev/i2c- 2 ). Having the bus information , we can use it to discover the features of the monitor. For the KVM-switch we are interested in the “ Input Source ” functionality. We can use the following command to find the feature ID and acceptable values to configure it.
sudo ddcutil capabilities --bus=2 | grep -A 5 "Input Source"
Feature: 60 (Input Source)
Values:
11: HDMI-1
12: HDMI-2
0f: DisplayPort-1
10: DisplayPort-2
This shows us that to change the monitor’s input device, we can use the feature ID 60 using the values (in hexadecimal) 0x11, 0x12, 0x0f and 0x10. To test, in this case:
Note: newer versions of ddcutil have much better support for identifying the display, so it may be possible that you can switch more easily using only the device number.
sudo ddcutil -d 1 setvcp 60 0x0f
If ddcutil is unable to identify the device by its number, you can try using the bus ID instead:
sudo ddcutil --bus=2 setvcp 60 0x0f &
Executing this command is now possible to change the monitor input using only the command line.
Finishing and Integrating in Gnome
Having in hand the commands to change the mouse, keyboard and monitor. We can put all this in a script:
sudo ddcutil --bus=2 setvcp 60 0x0f &
solaar config "MX Keys" change-host 2
solaar config "MX Master 3" change-host 2
Repeat the process for other hosts of your virtual KVM-switch (eg micro 1, micro 2, etc). Don’t forget to give the scripts execute permission.
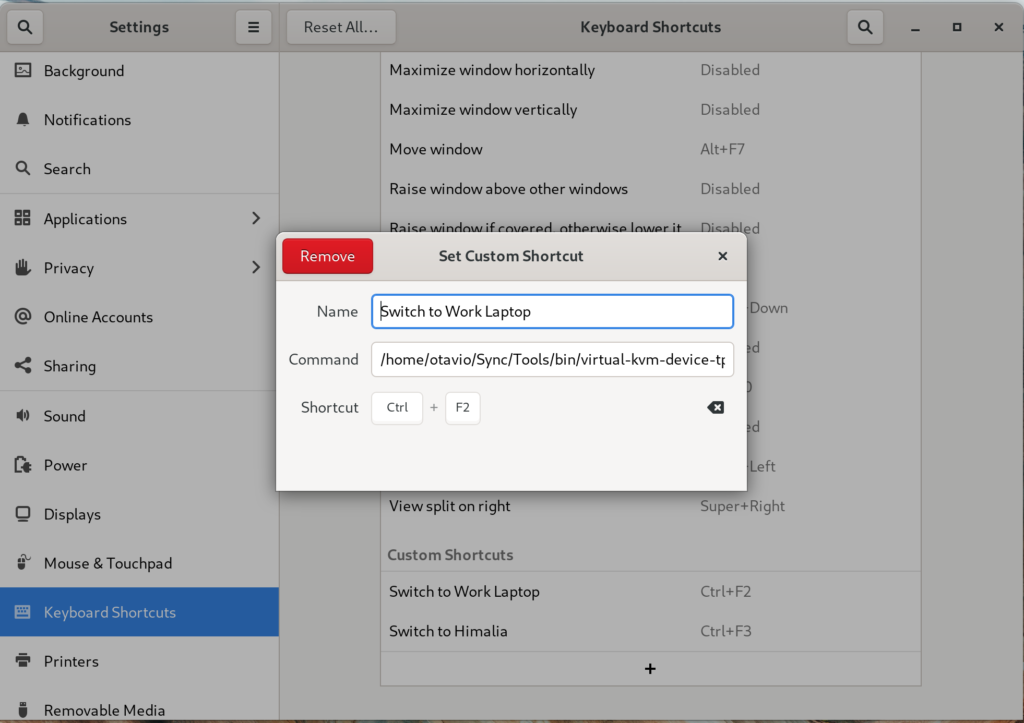
Finally, we can create keyboard shortcuts in Gnome to run these scripts.

How it works?
In my case I set the shortcuts Ctrl+F2 to switch to work laptop and Ctrl+F3 to switch to personal laptop. Here’s it in action:
Note:
- I imagine it works with any Logitech keyboard that supports multiple devices (like the K810 ), but I haven’t tested it.
- As well as the keyboard, I believe it should work with other mice that support multiple devices, like the Logitech M720 Triathlon .
- It is possible to use
ddcutilwithout sudo and the reference article shows how to do that, but I did not do it here. (It should be as simple as havingSUBSYSTEM=="i2c-dev",MODE="0666"in a file named/etc/udev/rules.d/90-i2c.rules)